Task 2: How to make your code citable using GitHub and Zenodo
This task is designed for students and researchers who want to create and re-use GitHub-based projects/repositories in the academic literature.
Estimated time to complete: 45-60 minutes.
Table of contents
- Set up a GitHub repository
- Choose your GitHub repository
- Login to Zenodo
- Authorise GitHub to connect with Zenodo
- Select the repository to archive
- Check repository settings
- Create a new release
- Getting a DOI
- Checklist for citing your project
- Additional resources

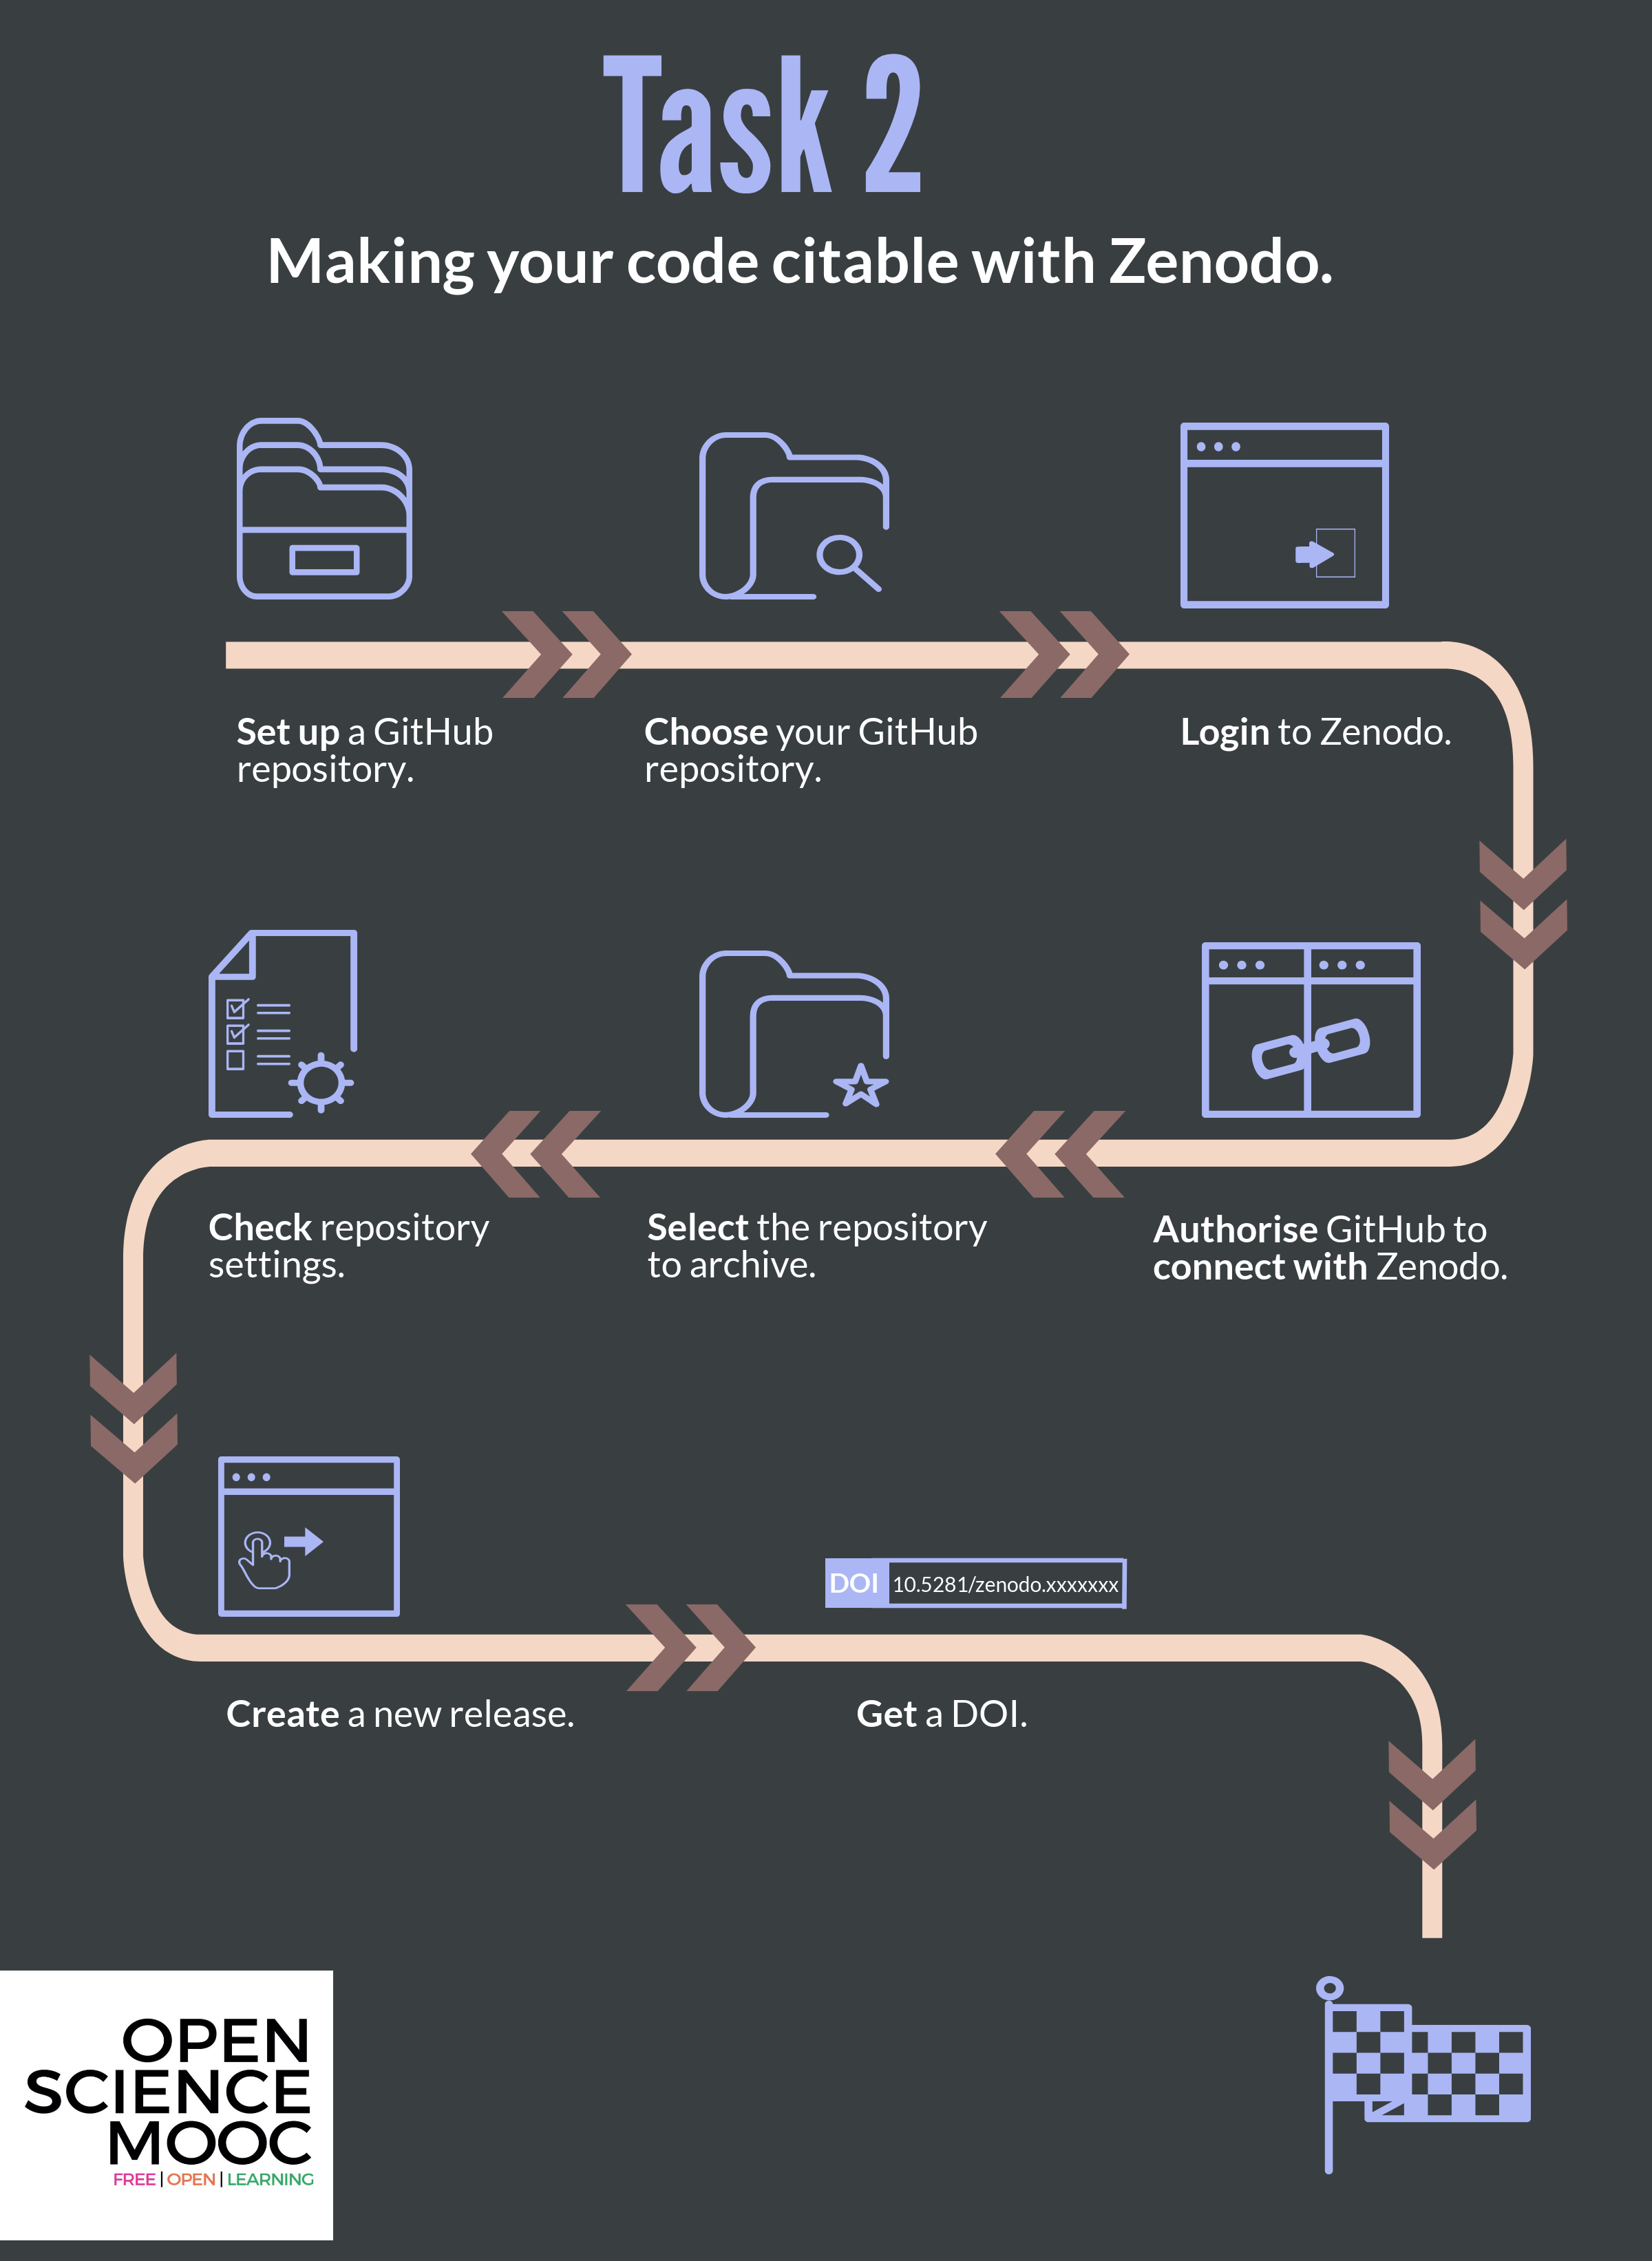
The workflow for Task 2. Keep this handy as you work through the task!
Set up a GitHub repository
Pro-tip: Make sure to include a LICENSE and README file in your repository. This will indicate to people the purpose of the project, and how they can engage with it in the future.
Find out how to set up a GitHub repository in this other guide Task 1: Building a GitHub repository which is also part of ‘Module 5: Open Research Software and Open Source’.
Choose your GitHub repository
Once on your GitHub project listings page at github.com head to the ‘Repositories’ tab. Select which repository you would like to archive, and open it up.
Login to Zenodo
Now head over to zenodo.org. Zenodo is a platform where you can permanently archive your code and other project elements. Zenodo does this by assigning projects a Digital Object Identifier (DOI), which also helps to make the work more citable. This is different to GitHub, which acts as a place where the actual work on a project takes place, rather than long-term archiving of it. At GitHub, content can be modified, deleted, rewritten, and irreversibly changed, which makes it a bit concerning to be used for longer lasting referencing purposes. Zenodo offers more security and permanence for research outputs.

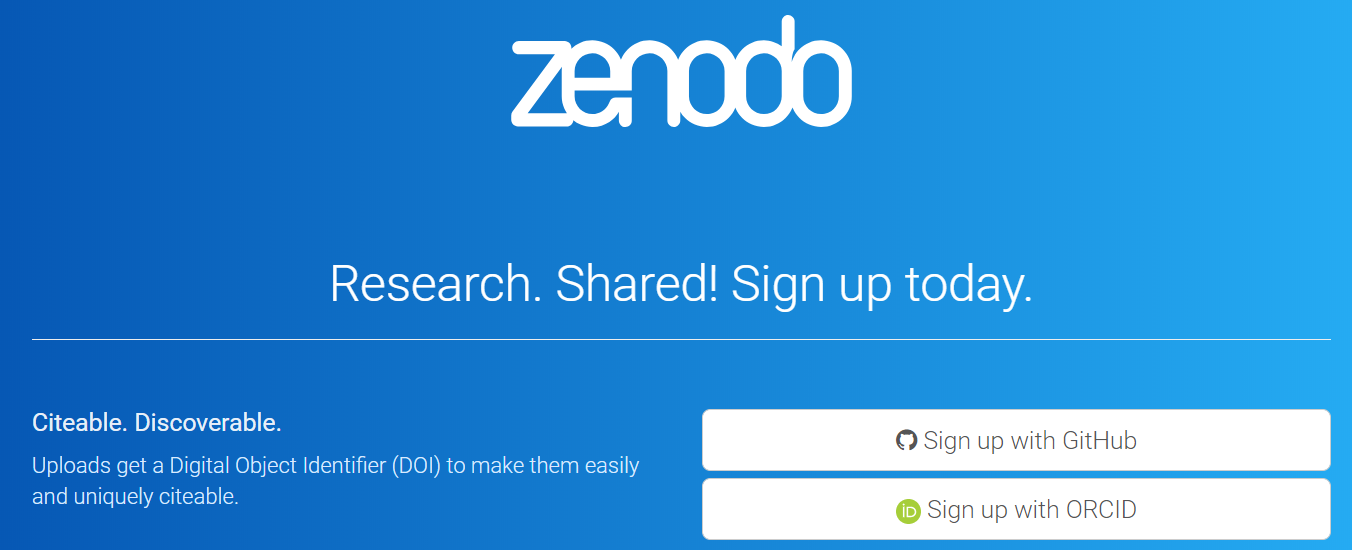
Sign up for Zenodo
If you already have a Zenodo account, this is easy. If not, follow the steps to create one — you can even login using your GitHub account or ORCID profile to make things simpler, as Zenodo has a built in integration for it. This might be easier than creating yet another research account and profile.
Authorise GitHub to connect with Zenodo
On the Zenodo website authorise it to connect to your GitHub account in the ‘Using GitHub’ section. Here, Zenodo will redirect you to GitHub to ask for permissions to use ‘webhooks’ on your repositories. You want to authorise Zenodo here with the permissions it needs to form those links.

Authorize Zenodo to connect with GitHub
If you are trying to give Zenodo access to an organisational repository, you (or an administrator) will need to make sure that Zenodo is granted third party access permissions. GitHub will send an authorisation email that needs confirming. At this point, back in the settings of your repository on GitHub, you also need to make sure that the repository is set to ‘public’, not private.
Select the repository to archive
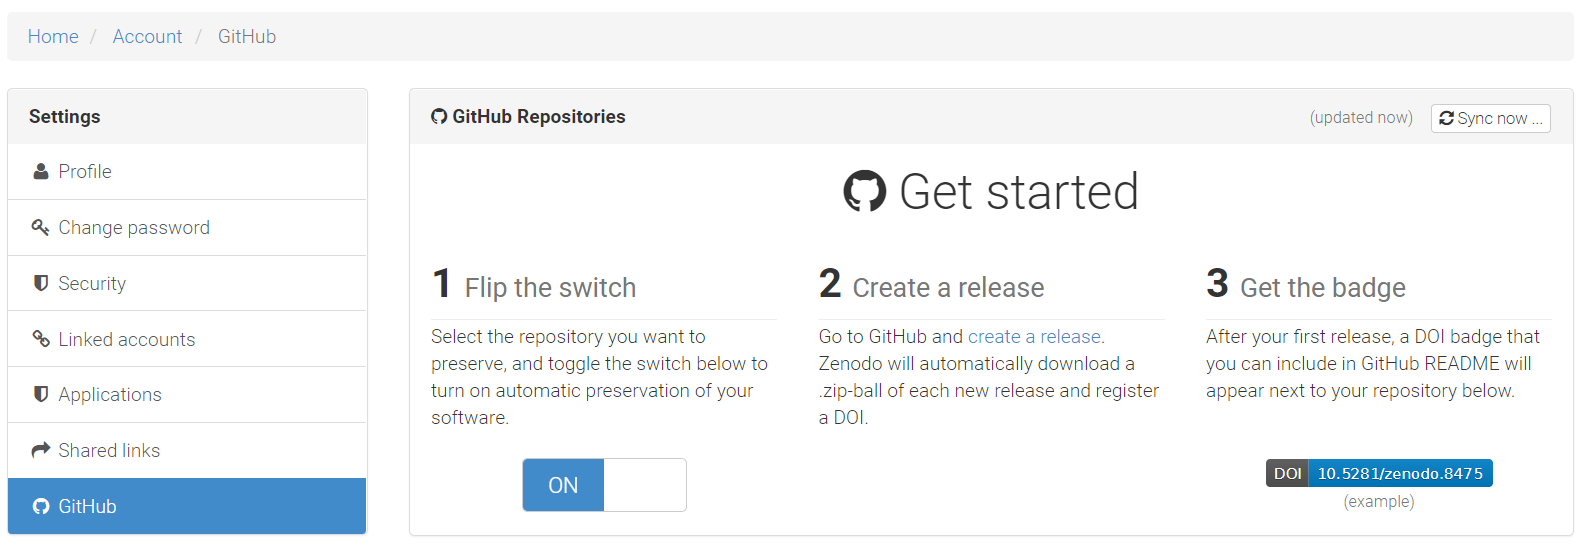
If you have got this far, this means that Zenodo is now authorised to configure the repository webhooks that it needs to archive the repository and issue it a DOI. To do this, on the Zenodo website navigate to the GitHub repository listing page and simply click the ‘on’ button next to your repository.

Enable individual GitHub repositories to be preserved in Zenodo
Check repository settings
Now you have set up a new webhook between Zenodo and your repository. In GitHub, click on the settings for your repository, and the Webhooks tab on the left hand side menu. This should display the new Zenodo webhook configured to Zenodo. Note, it may take a little time for the webhook listing to show up.

Check that webhooks are enabled for your GitHub repository. Example here using the Open Scholarship Strategy
Create a new release
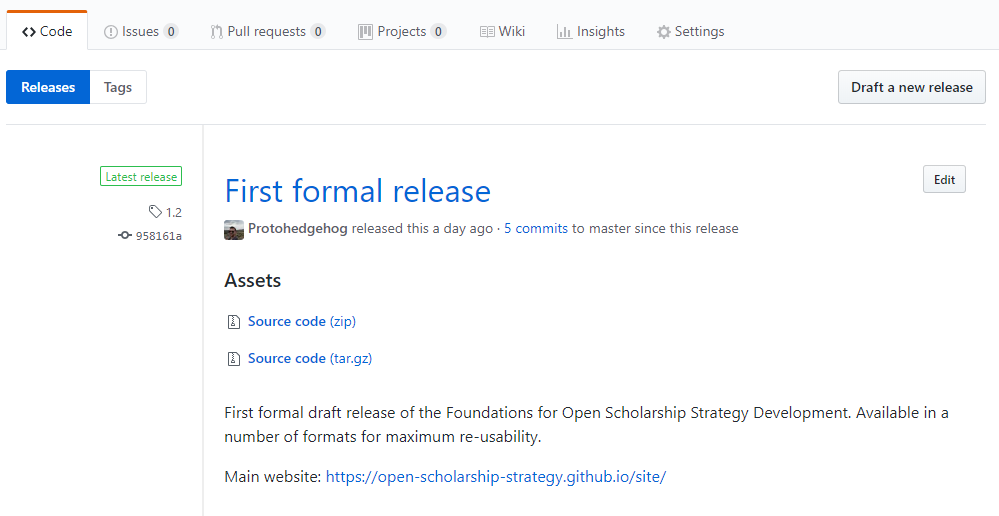
The first time you archive a repository is known as the ‘first release’. Each time you create a new version of that repository and archive it, you create a new release. This can be tracked in the ‘releases’ tab for your repository on GitHub (top center).

Check that the repository first release was successful. Example here using the Open Scholarship Strategy
For the first archived version of your repository, click ‘Create a new release’ back in Zenodo. Fill in the form and give some details as to what the release entails. For the first release, make sure to call it v1.0.0, as is standard practice.

Create a new release. Example here using the Open Scholarship Strategy, for which a first release already exists
Finally, click ‘publish release’, and your archive will be published and versioned on GitHub.
To view your release on Zenodo you need to visit the Upload tab. To finish the archiving a few more details are needed on Zenodo.

Check the new release has been uploaded. Example here shown using the Open Scholarship Strategy
Getting a DOI
This is sometimes referred to as DOI ‘minting’, and requires a couple of extra bits of information about the repository on Zenodo. On Zenodo click the Upload tab in the main menu, and your newly uploaded repository should be there. Scroll down the page and fill in the extra information as needed, required fields are marked with a red asterisk, and then click ‘Publish’.
Note: Only after this extra information has been added will your DOI become live. It may also take a short time for the DOI to become active. Example DOI shown below (for the Open Scholarship Strategy again).
Pro-tip: Copy the URL for the DOI into the README file for your GitHub repo to make cross-linking even easier, as well as present a clear highlighted DOI badge for users to see and make use of your DOI. You only need to do this once with your first release DOI as it acts as a ‘concept DOI’ and is linked to all subsequent release DOIs.
The GitHub/Zenodo integration will now assign a DOI to each version/release of a project repository. This enables users to refer to and cite specific versions of projects. Also, the list of authors for the citation is automatically determined by the GitHub user account names used by the repository - this means no-one gets left out. Author details can be edited later on Zenodo. DOIs used in Zenodo are registered through the DataCite service.
Pro-tip: Create a ‘human-readable’ version of this citation in your project’s README file. This will be helpful to researchers who might not be familiar with using DOIs to create citations, and make it easier for others to cite your software and acknowledge your work. An example of this could be: Jon Tennant. (2018, July 30). Foundations for Open Scholarship Strategy Development: First formal release (Version 1.2). Zenodo. http://doi.org/10.5281/zenodo.1323437
CONGRATULATIONS!!
Your GitHub repository is now archived in Zenodo, and with a DOI that can be versioned to reflect updates to the repository version through time. You should be able to see details of this on the GitHub Zenodo page for your repository. This also means that your archived projects can get picked up by other indexing services and search engines that use DOIs too.
Providing a long-term archive and a DOI for your work is required for others to be able to properly cite it, as this provides basic citation metadata. For Open Science, it is important to be able to cite the software that you use in your research, and this integrated workflow enables that to happen, in line with best practices for research citation. Furthermore, this practice is important in elevating the standard of software (and related projects) to that of the standard of other research outputs.
Pro-tip: Is your research funded by an EU grant? Now you can directly connect your archived project to your grant by updating the grant section of the metadata on the project’s Zenodo record. This massively helps to increase its discoverability!
Checklist for citing your project
So now you have a sustainably archived GitHub repository in Zenodo that is ready to be re-used and cited! Before continuing, make sure that you have:
- Linked your GitHub project to Zenodo. If you see a complete copy of your GitHub repository in Zenodo then things are working.
- Zenodo and GitHub integrated setup works nicely. For example have all the author names, and correct project title come across to Zenodo. If not, or if authors just have nicknames you can edit these details in Zenodo.
- Project has a first release, with a DOI. You should have a DOI displayed on your projects Zenodo page. This first DOI is called the ‘concept DOI’ and is the master DOI linking to all subsequent release DOIs. Copy this DOI link and embed it in your GitHub projects README page. You’re done!
Additional resources
- Making your code citable - GitHub Guides.
Know a way this content can be improved?
Time to take your new GitHub skills for a test-run! All content development primarily happens here. If you have a suggsted improvement to the content, layout, or anything else, you can make it and then it will automatically become part of the MOOC content after verification from a moderator!